How to Set Up and Use Your Safe Multisig Wallet

Understanding and utilizing multisig wallets like Safe is critical for secure digital asset management in today's cryptocurrency environment. This article will guide you through setting up and using your Safe multisig wallet.
Without further ado, let’s get started!
What is Safe
Safe is an open-sourced multisig wallet on Ethereum and EVM-compatible chains. If you’re new to crypto, a “multisig wallet” is a smart contract wallet where a predetermined number of approved addresses must sign each transaction before being submitted on-chain. Initially built by the Gnosis team and known as Gnosis Safe, it evolved with a dedicated mission to establish a superior standard for digital asset ownership using smart contract accounts.
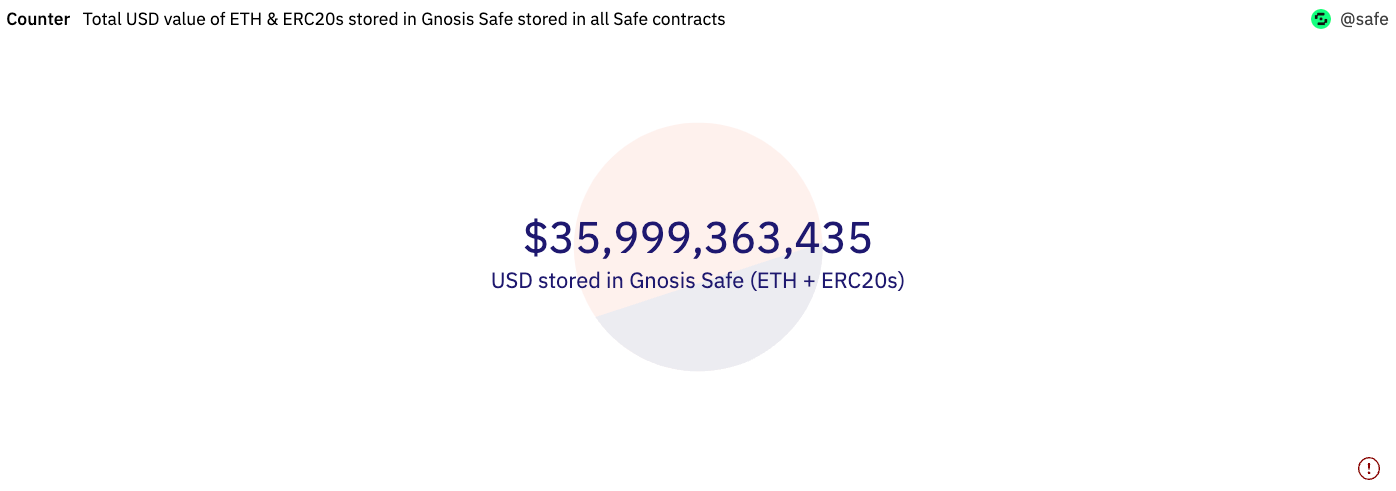
At the time of the writing, over $36 billion worth of assets are stored on the contracts created by Safe.
How to Set up a Safe
Setting up a Safe is easy. Head to Safe’s welcome page to get started.
After connecting your wallet, click “Create New Account.”

We’ll use the Goerli testnet in this tutorial. You can click the dropdown in the upper right corner to switch to the network. And given that you need to pay gas to create an account - you can get some test ETH on Paradigm’s or Alchemy’s faucet if you don’t have any.
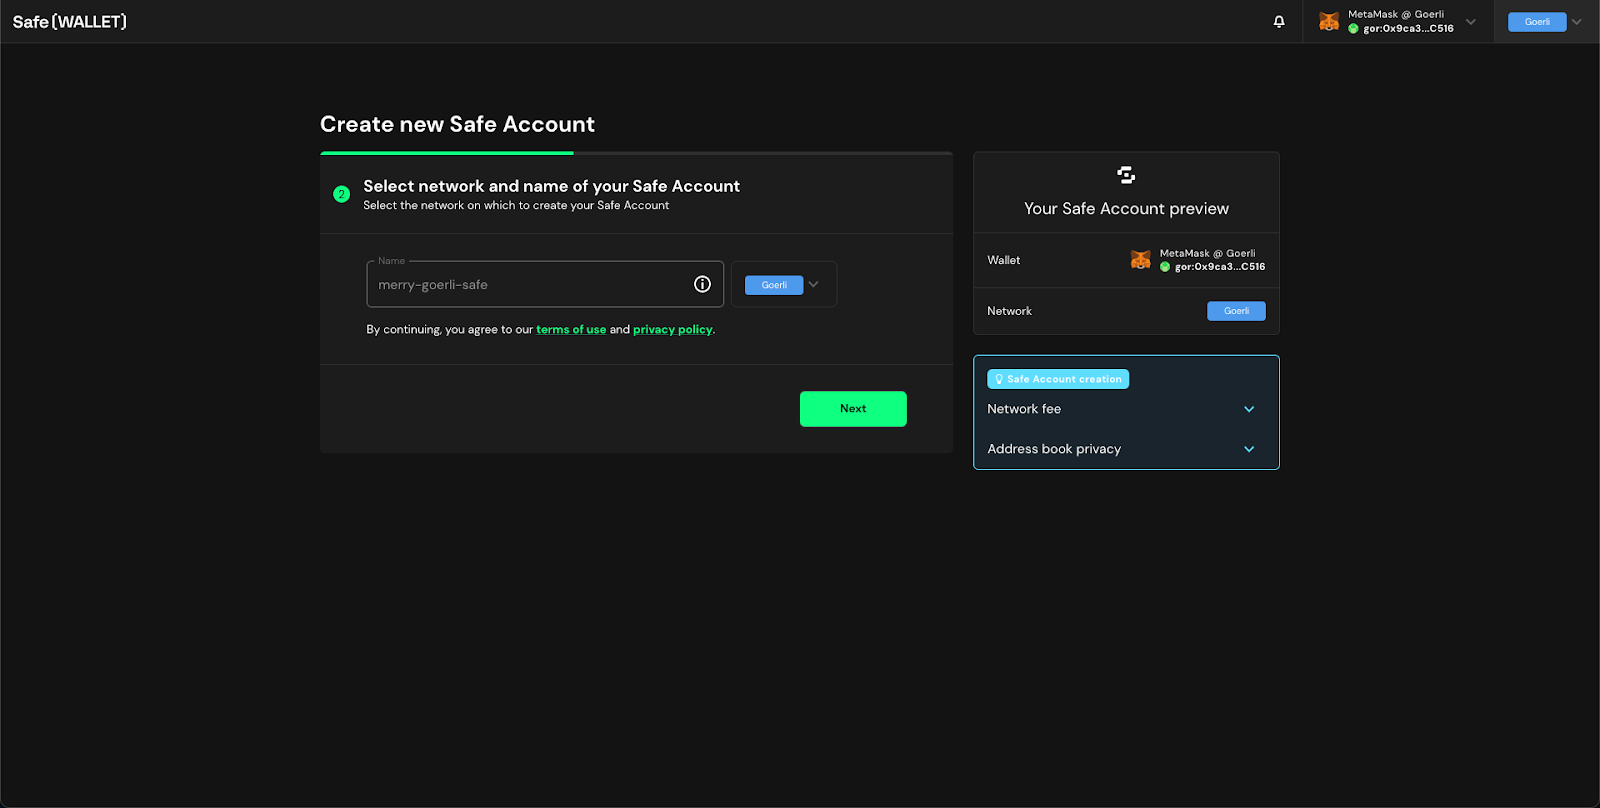
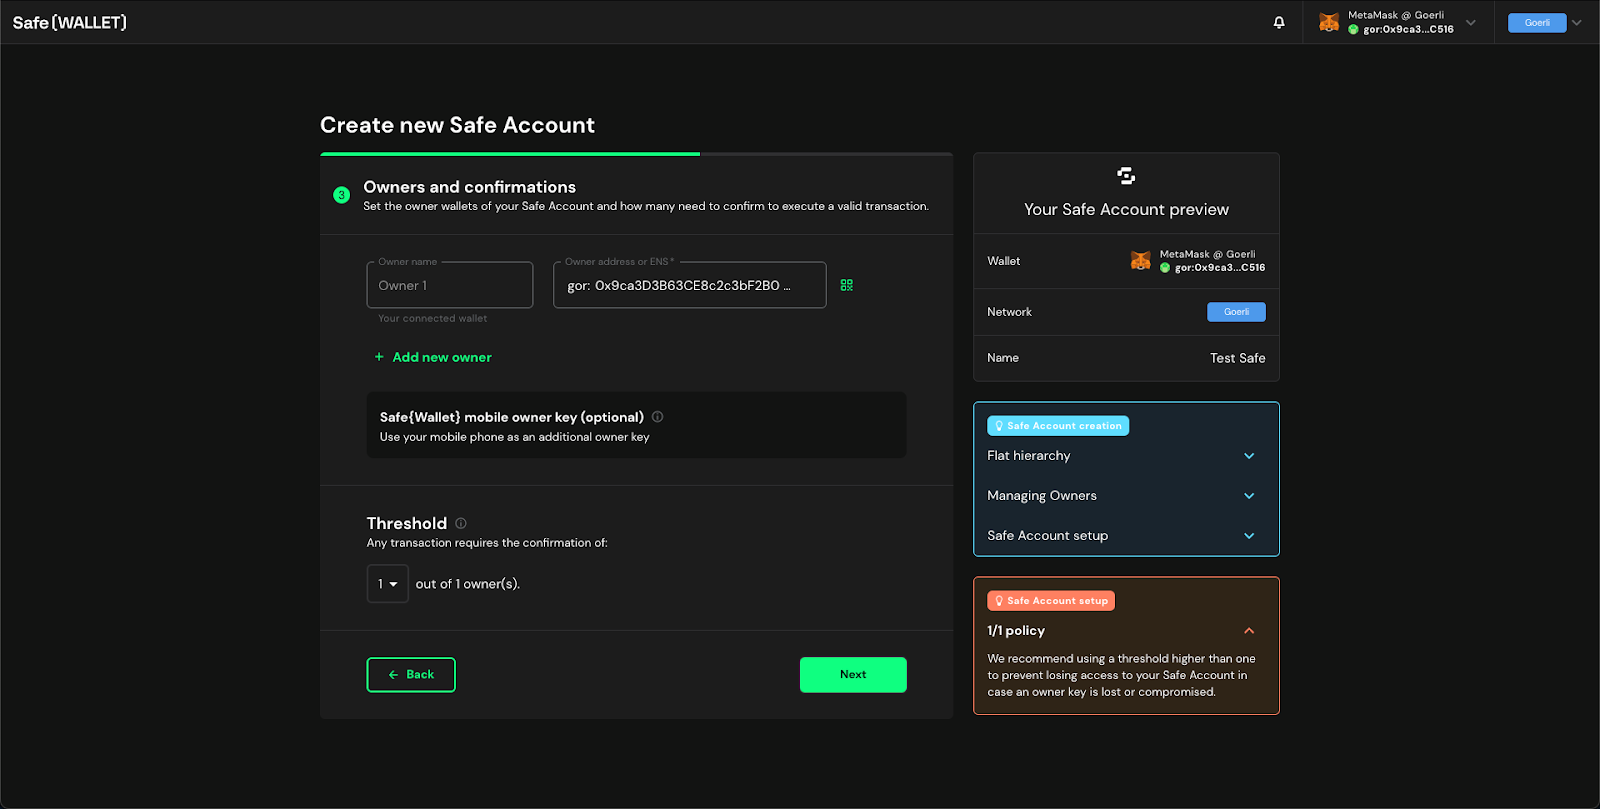
Once you’ve picked a name for your Safe, you must add the owners and set the threshold for your multisig wallet.
- For the former, you can generate multiple addresses from your MetaMask and put them here for this tutorial.
- As for the threshold, it’s the number of required signatures from Safe’s owners for a transaction to be submitted.
As a rule of thumb, the threshold should be an odd number and more than half of the owners. You can modify both fields after the creation of your Safe account.
Now, you’re almost there! Click “Next” and submit transactions on-chain to deploy your Safe account.
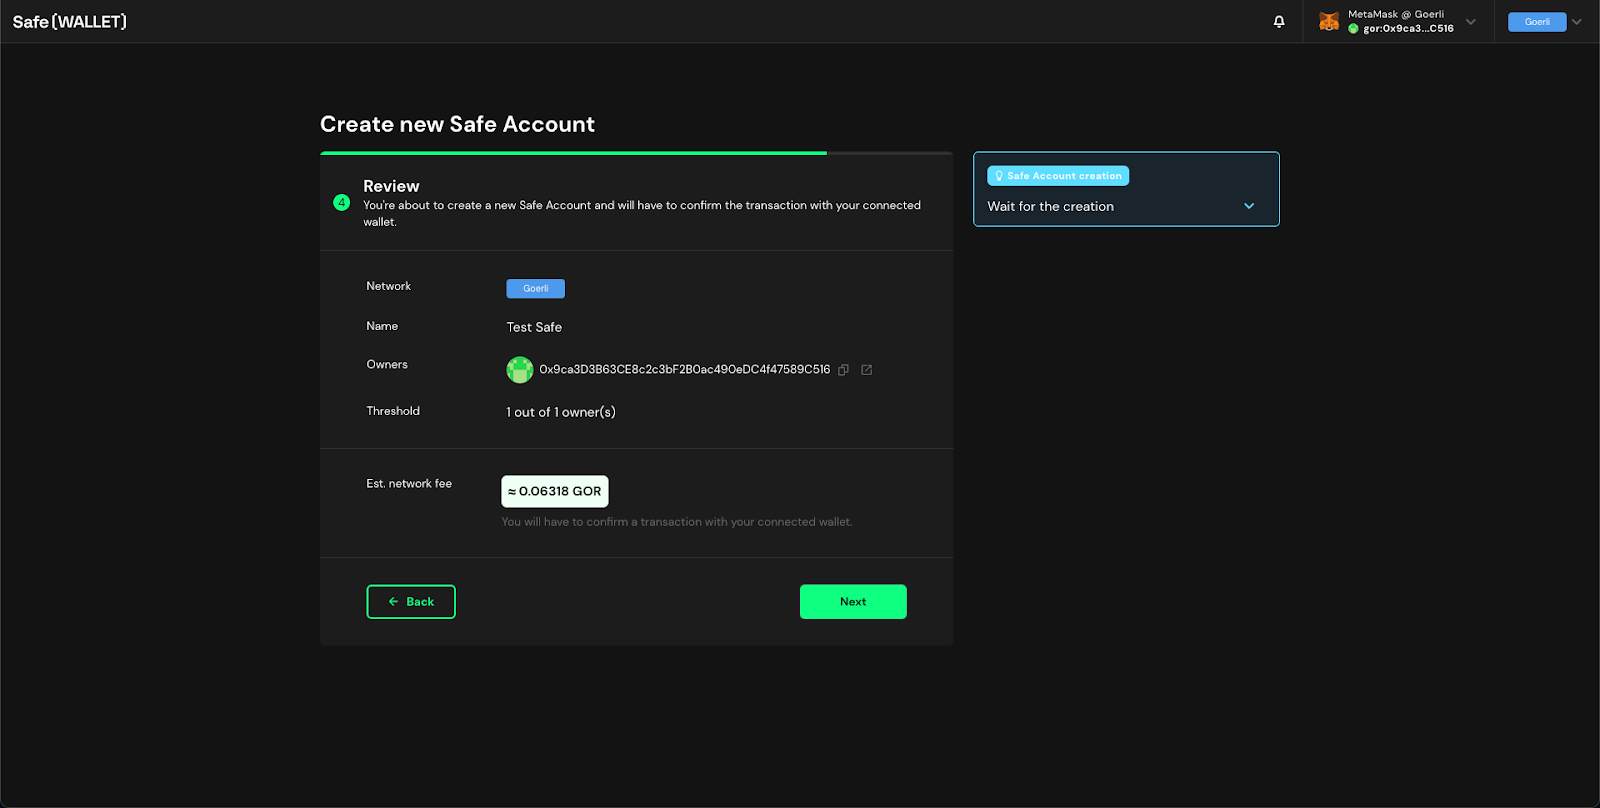
Once the transaction has been confirmed, you should be able to see the dashboard for your Safe account.
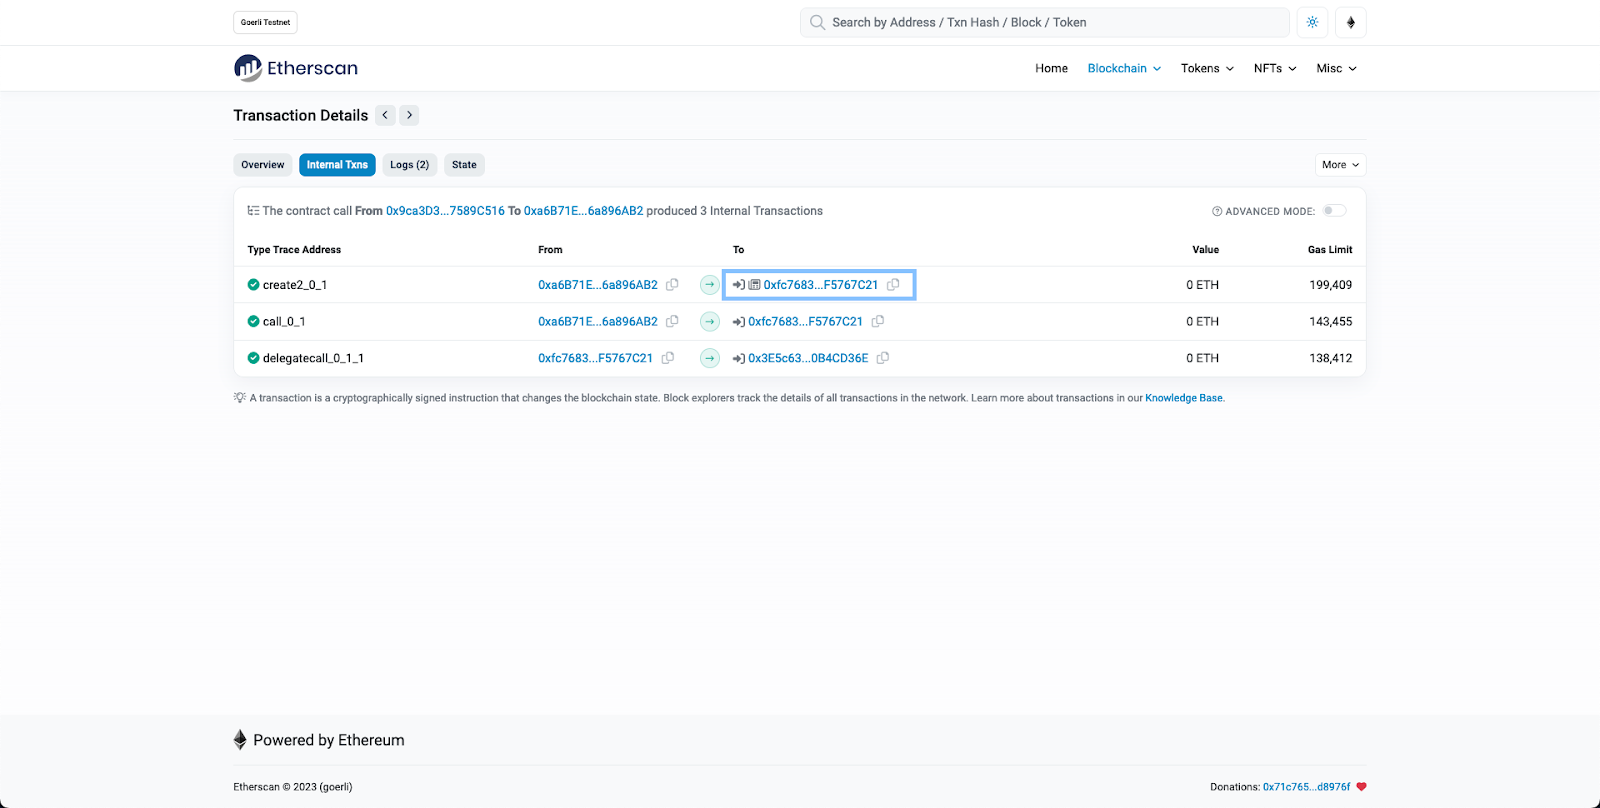
You can find the smart contract address for your Safe in three places:
- On the UI,
- In the URL (the string starting with 0x behind the safe parameter),
- The transaction which you created your Safe on Etherscan

How to Use dApps with Safe
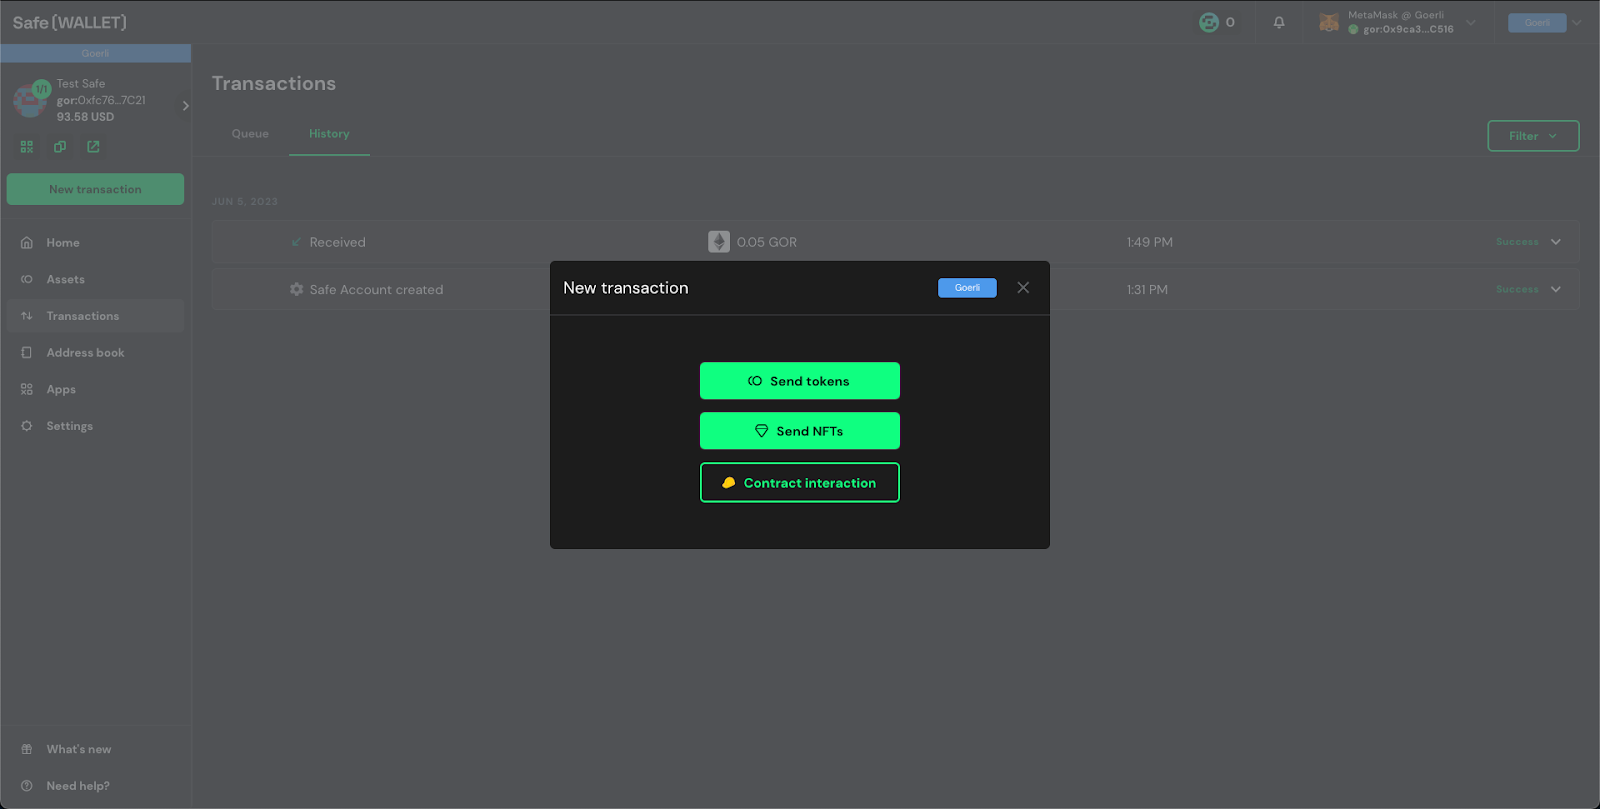
There are two main ways to use dApps with Safe.
Natively
First, you can use some dApps directly on your Safe. You can see the list of the supported dApps for the network that your Safe is on.
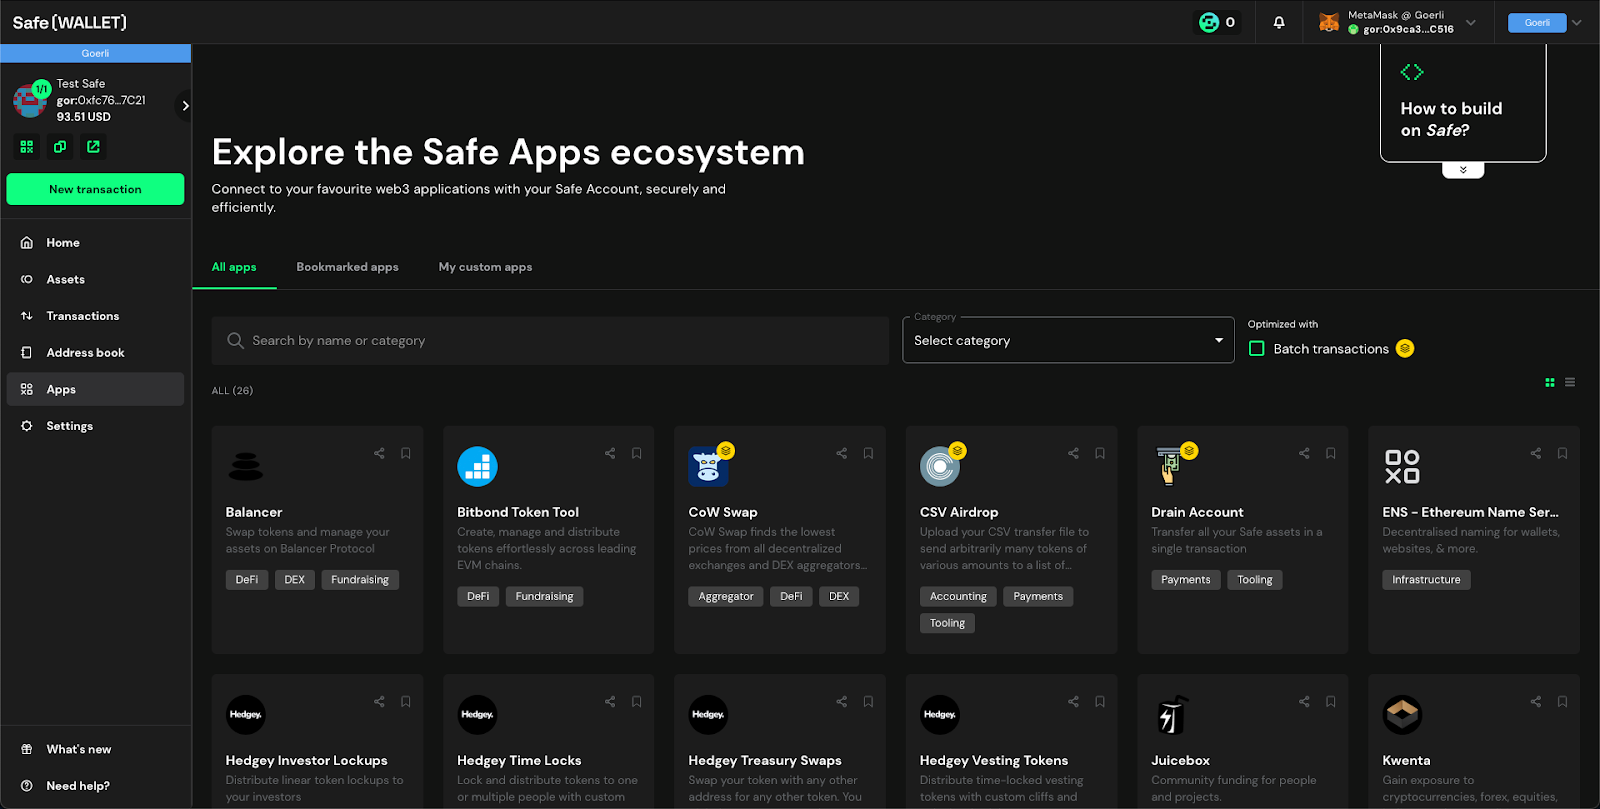
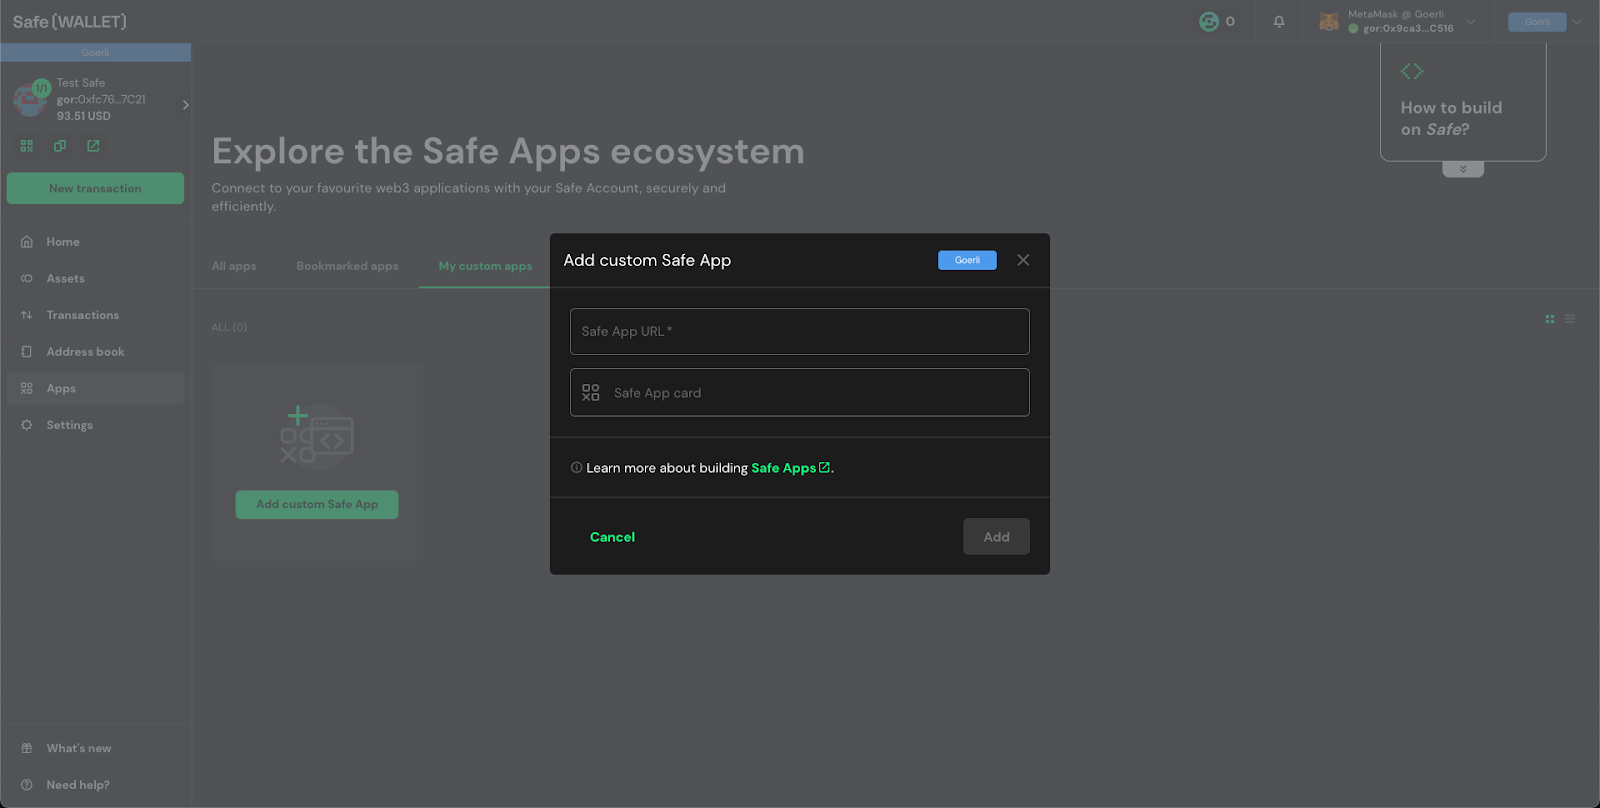
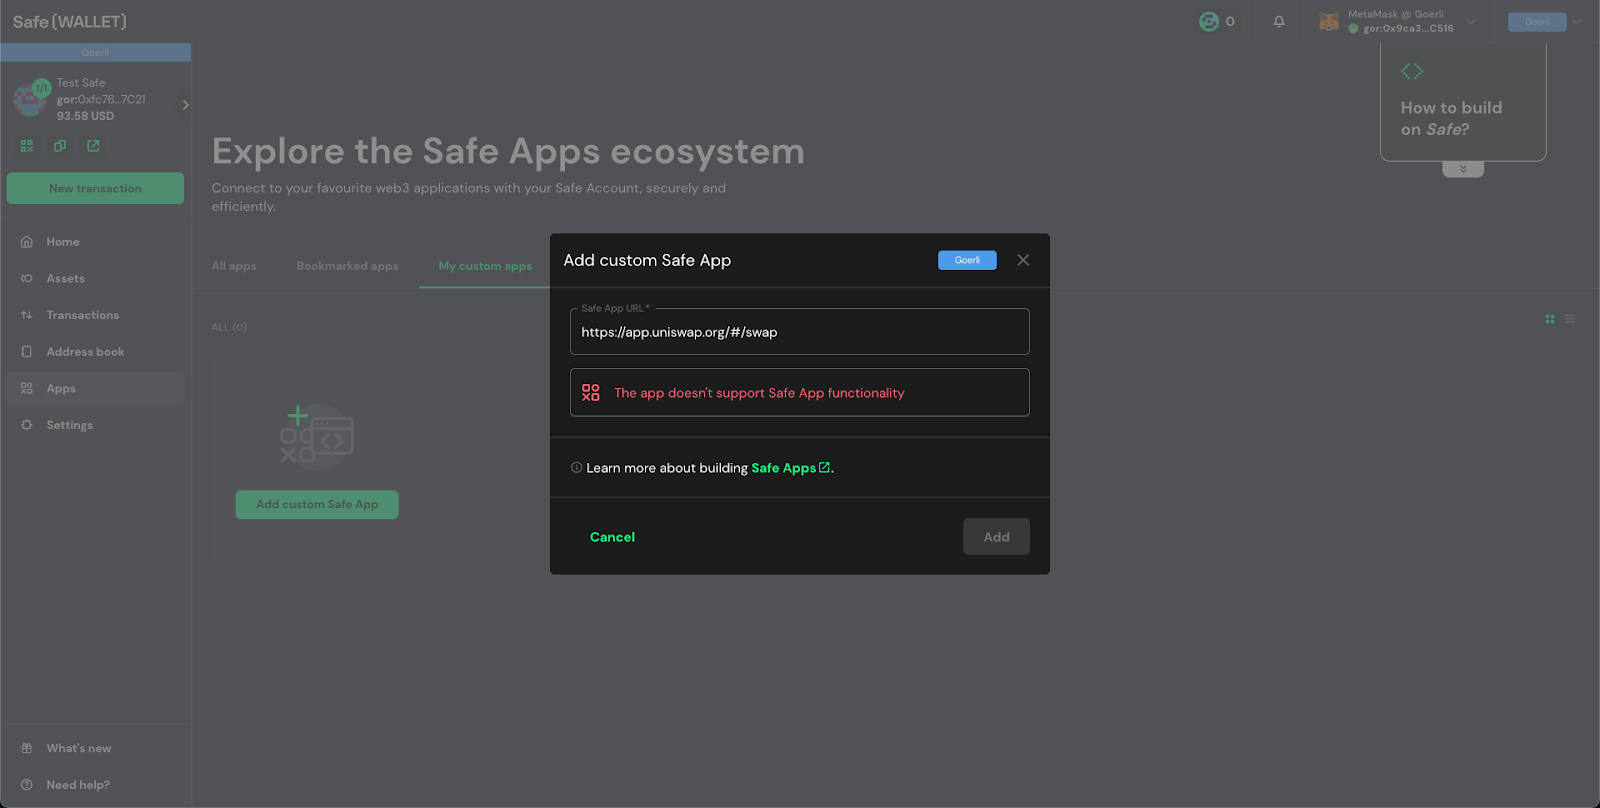
As you can see, only a limited amount of dApps directly support Safe. If the dApp you want to use is not on the list, you can try your luck by putting its URL in the Safe App URL field under “My custom apps.”
Manually
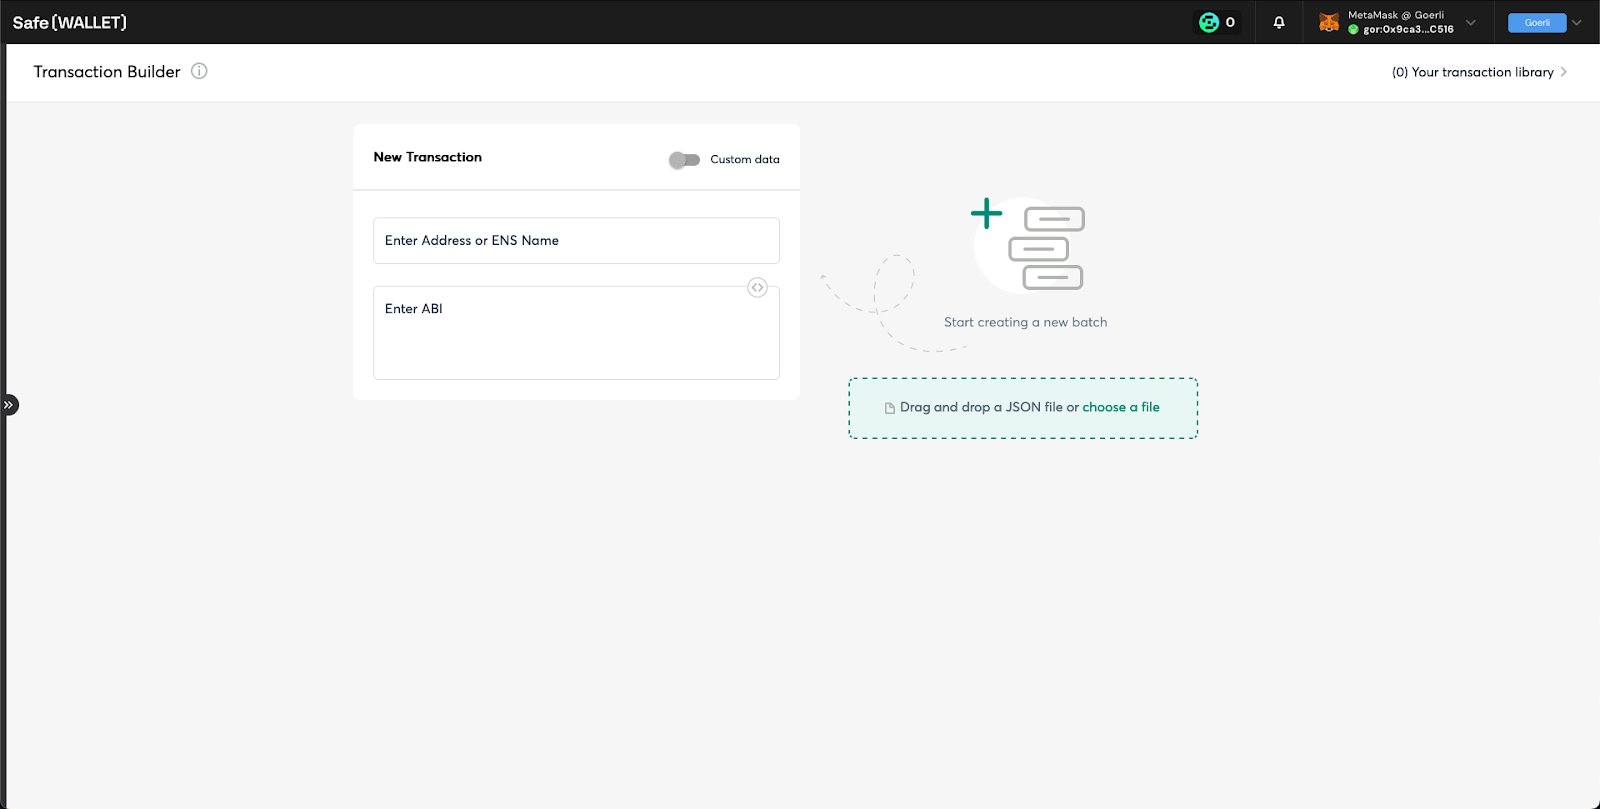
The other approach is to choose “Contract interaction” after clicking “New transaction.”
There are two fields to be filled - the first one is the dApp’s smart contract address that you want to interact with, and the second one is its ABI (The Application Binary Interface). You should be able to find the smart contract’s address and its ABI on Etherscan or the dApp’s technical docs.
Here is a quick explanation for ABI:
An ABI is like a user manual for a smart contract - it tells the UI what a smart contract can do and how to do it. When you, as a dApp user, perform actions like swapping tokens, staking, or lending, behind the scenes, you interact with smart contracts. The ABI of a smart contract facilitates this interaction by defining the "language" through which your actions (like clicking a "Swap" button) are translated into instructions that the smart contract can understand and execute.
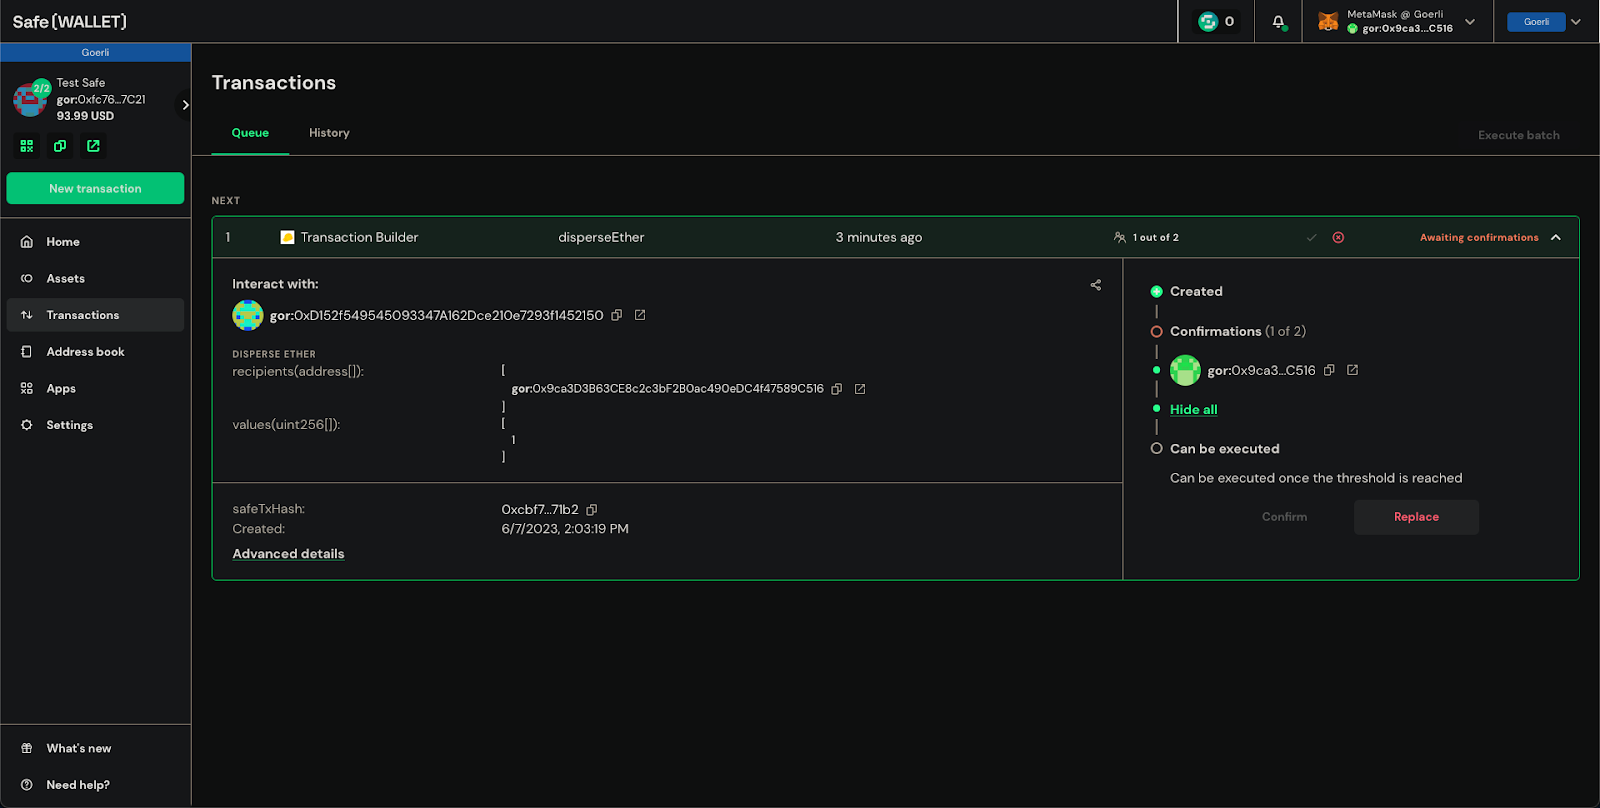
For this tutorial, let’s use Disperse to send ETH to multiple addresses. You can find the Etherscan link to its smart contract on its website. If you can’t find it on either of these places, try asking it on the project’s server.
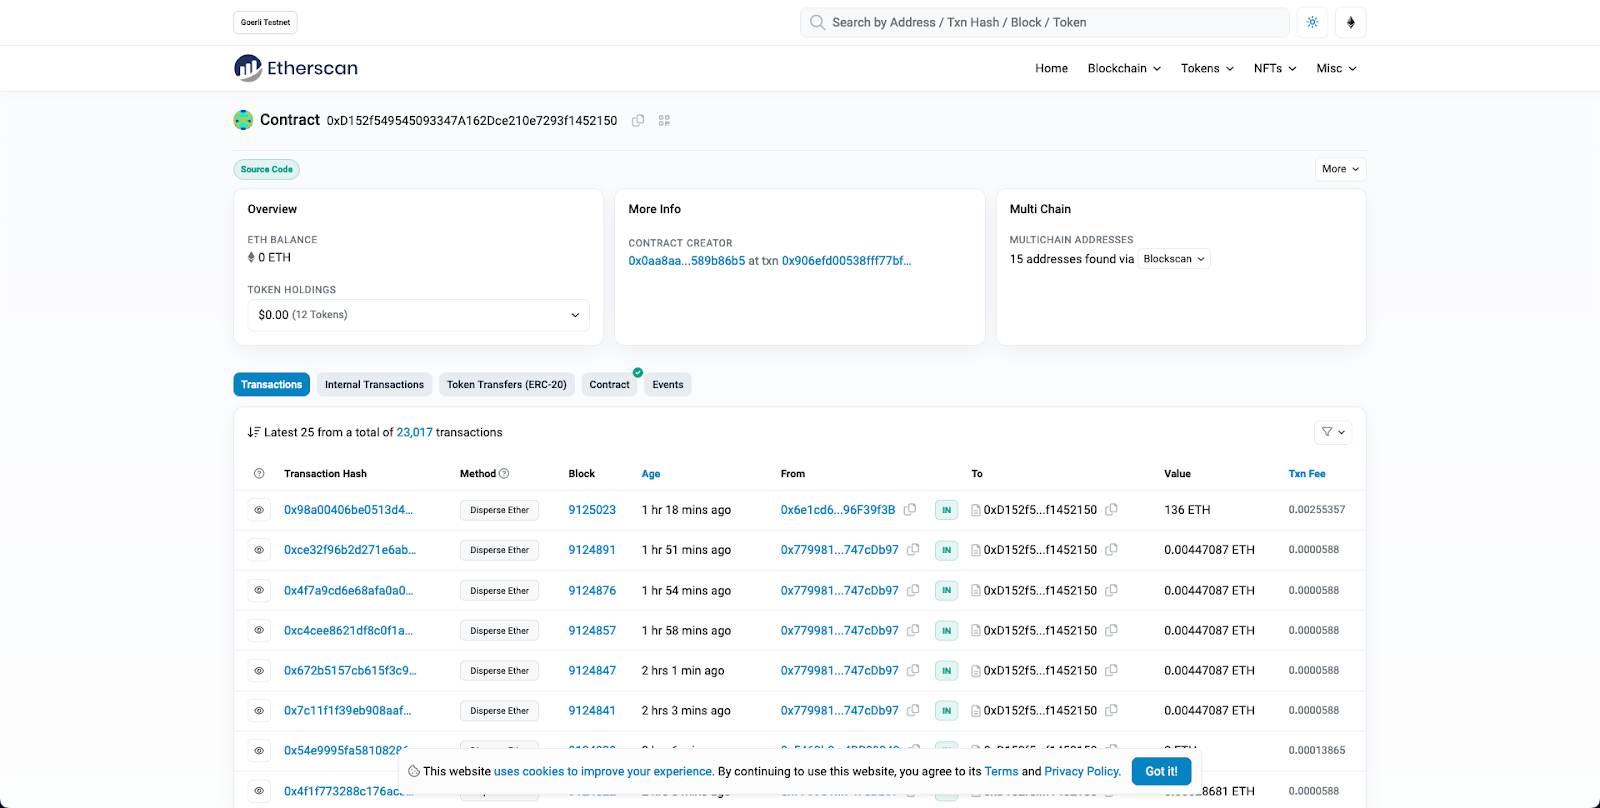
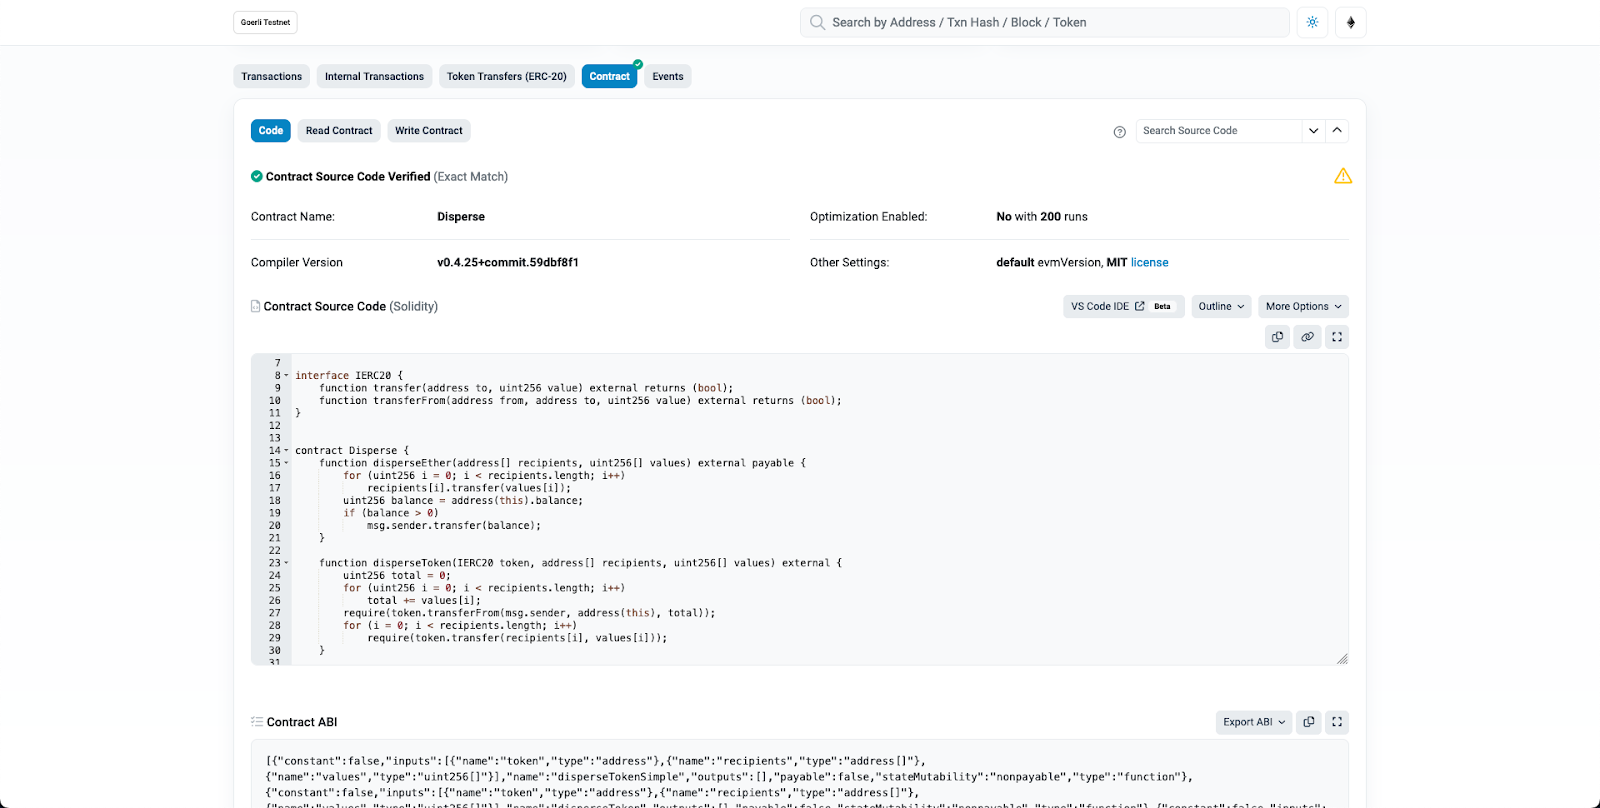
On Etherscan, click “Contract,” then you can see its ABI under the “Code” tab.
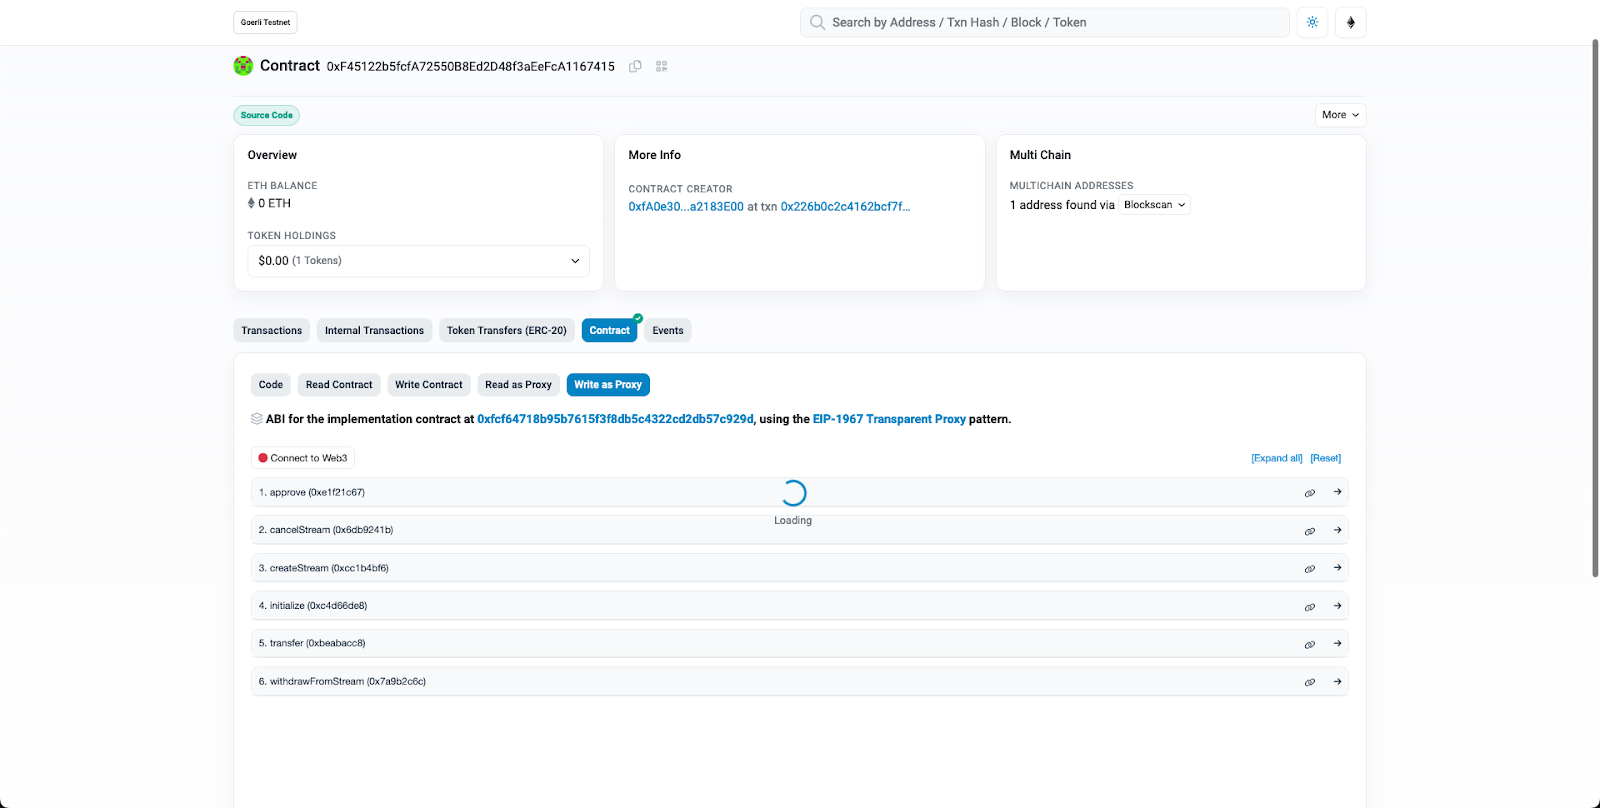
One thing worth mentioning is that for an upgradable contract, you’ll see additional buttons such as “Read as Proxy” and “Write as Proxy.” (see the example below) To see its ABI, press “Write as Proxy, “click the link to the implementation contract address (the bold text in blue) and then copy the ABI there instead.
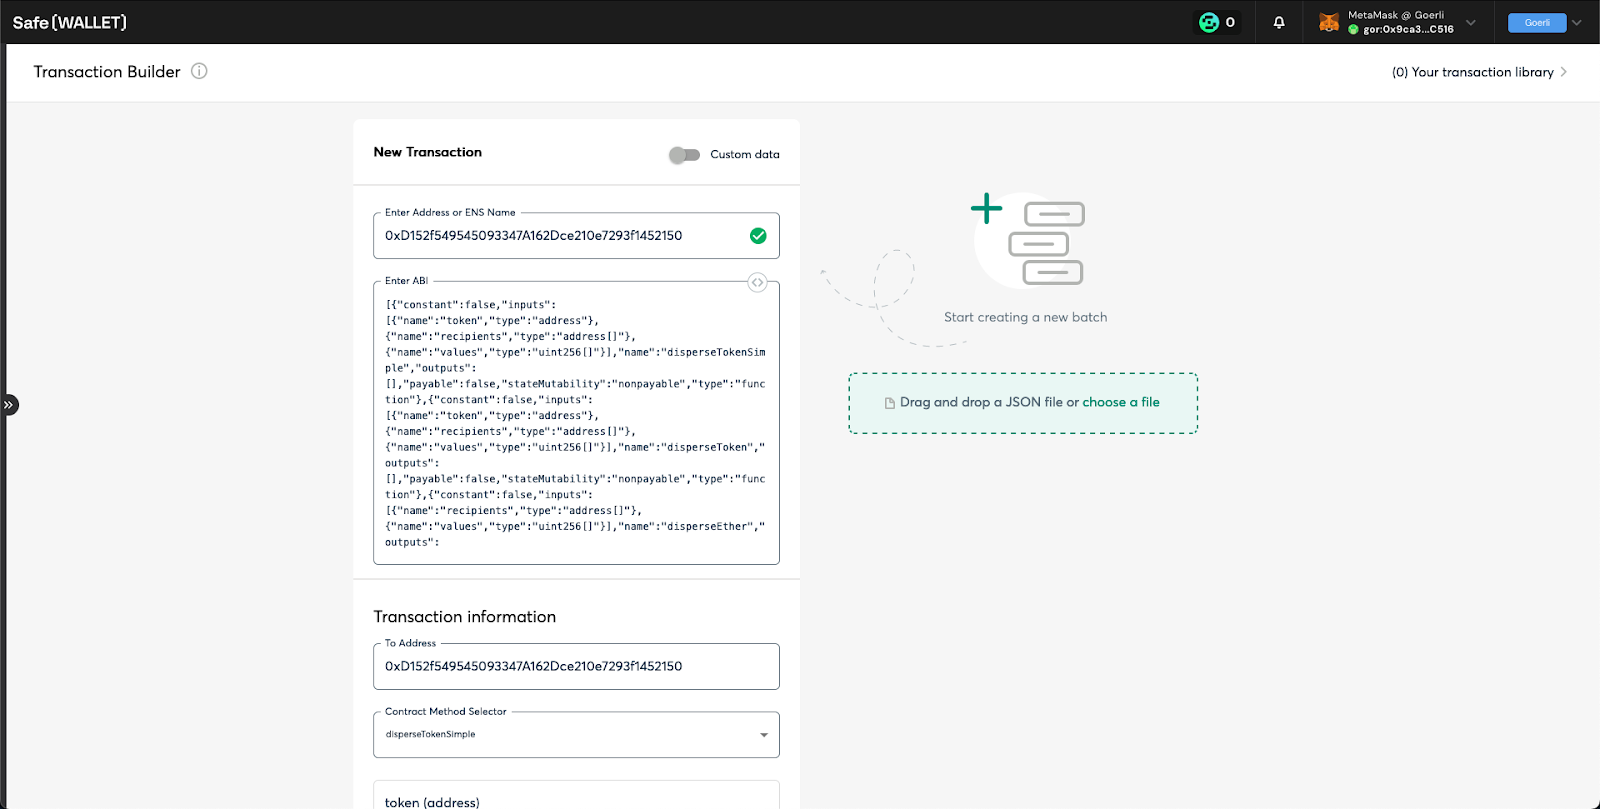
Direct yourself back to Safe and paste the address and its ABI into the input fields. Afterward, you should see more input fields shown on the page.
As a side note:
- If a smart contract is verified on Etherscan, Safe auto-populates its ABI for you after filling in the address field.
- If it’s a proxy contract like the example above, you need to put in the address of the proxy contract (the 0xF45…) and the ABI from the implementation contracts (the ABI from 0xfc6…).
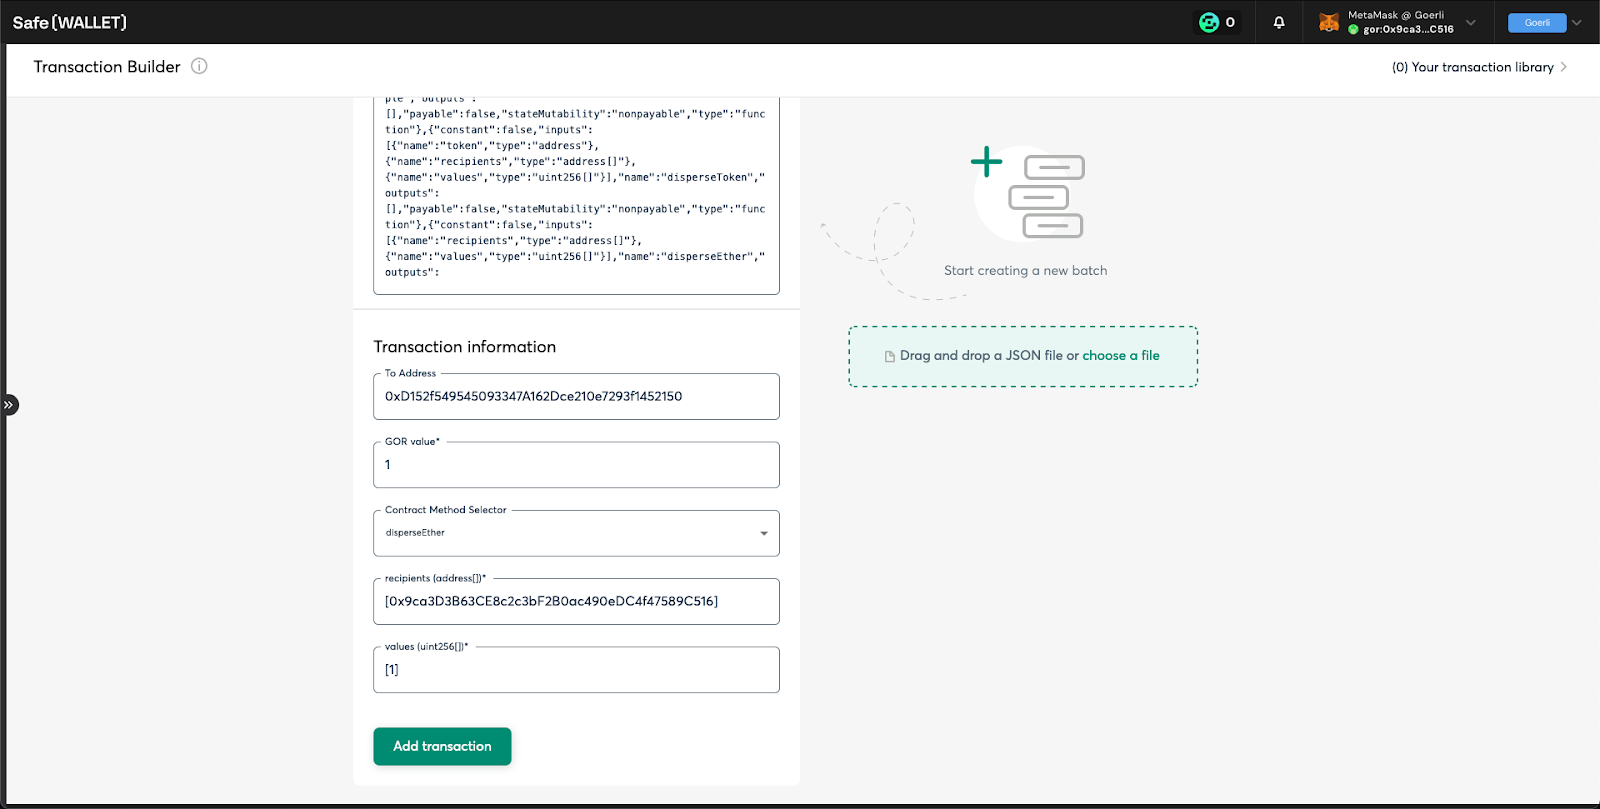
The following are the values you can copy and paste for the fields shown on the UI:
- Put 0.000000000000000001 in the GOR field (that’s the value of 1 Wei in ETH)
- choose “disperseETH” for “Contract Method Selector,”
- type your address inside a bracket ([]) as the recipients, and
- put [1] for values.
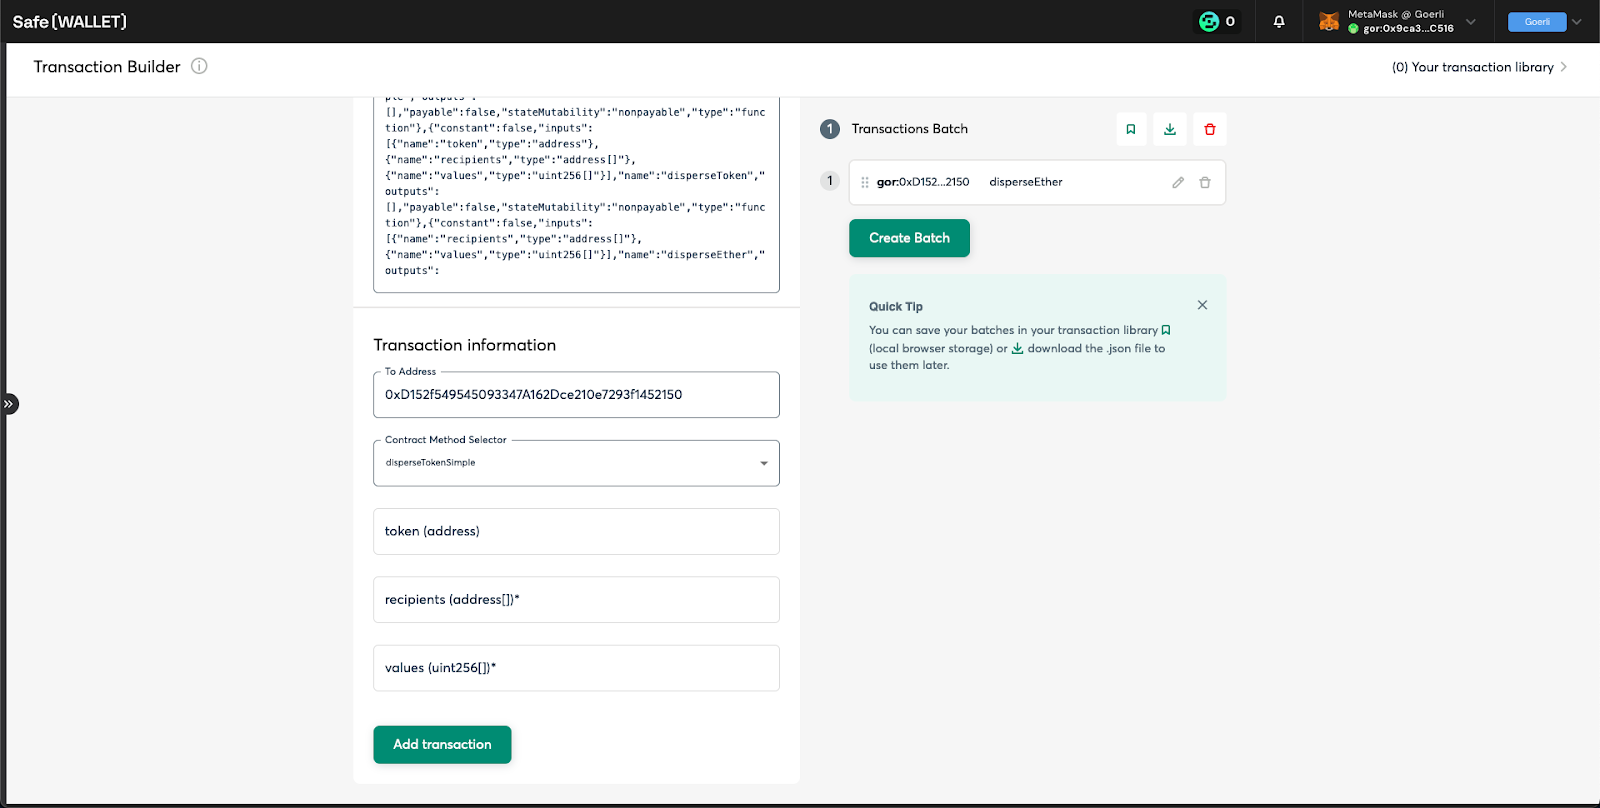
After clicking “Add transaction,” the transaction above is listed in the top-right corner. The reason is that you can batch multiple actions together with Safe. For instance, you can batch token approval, swap, and transfer in a single transaction.
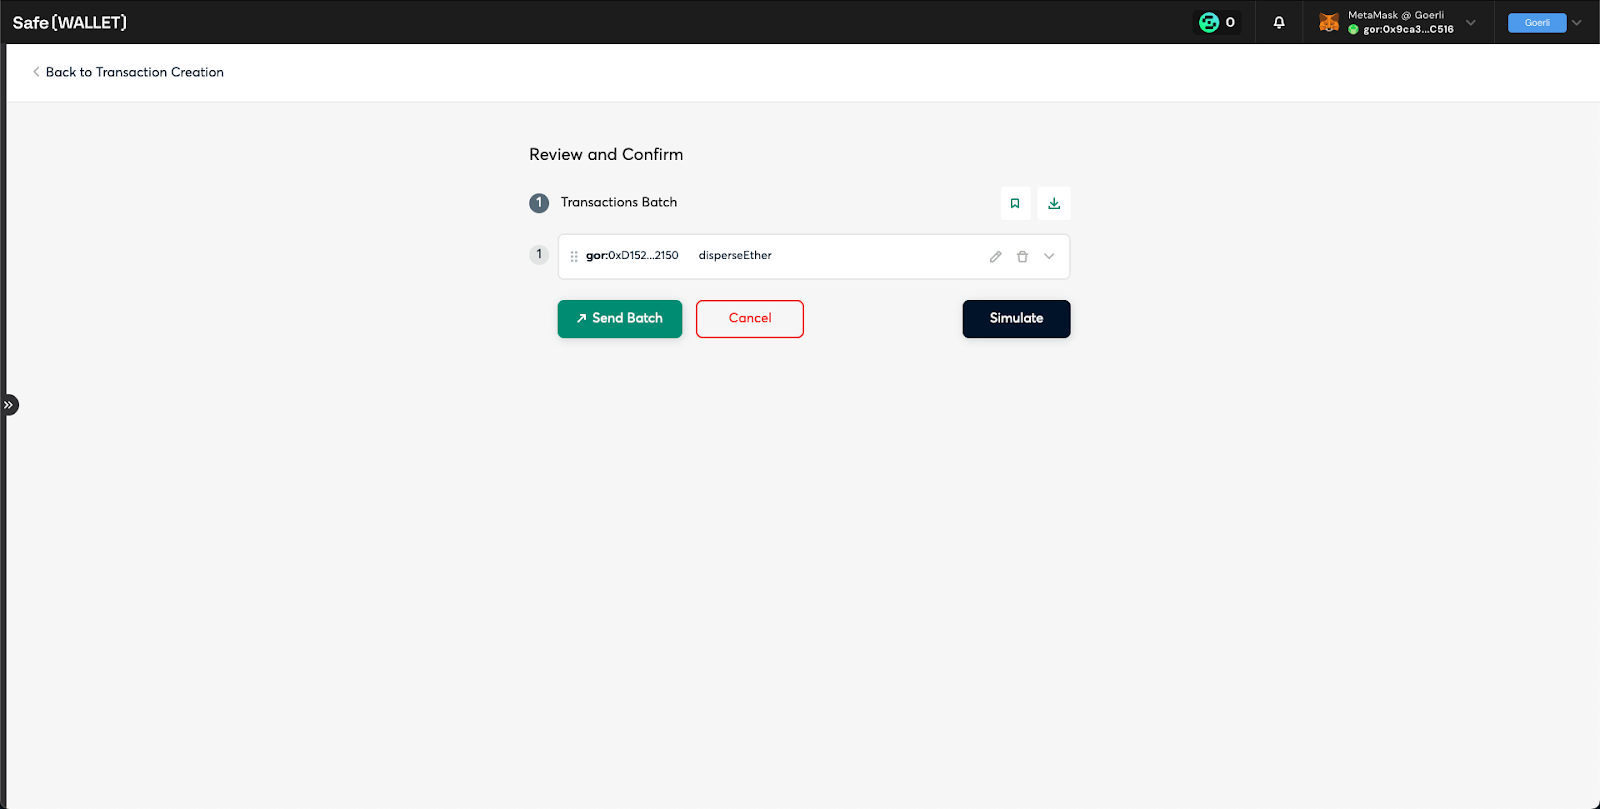
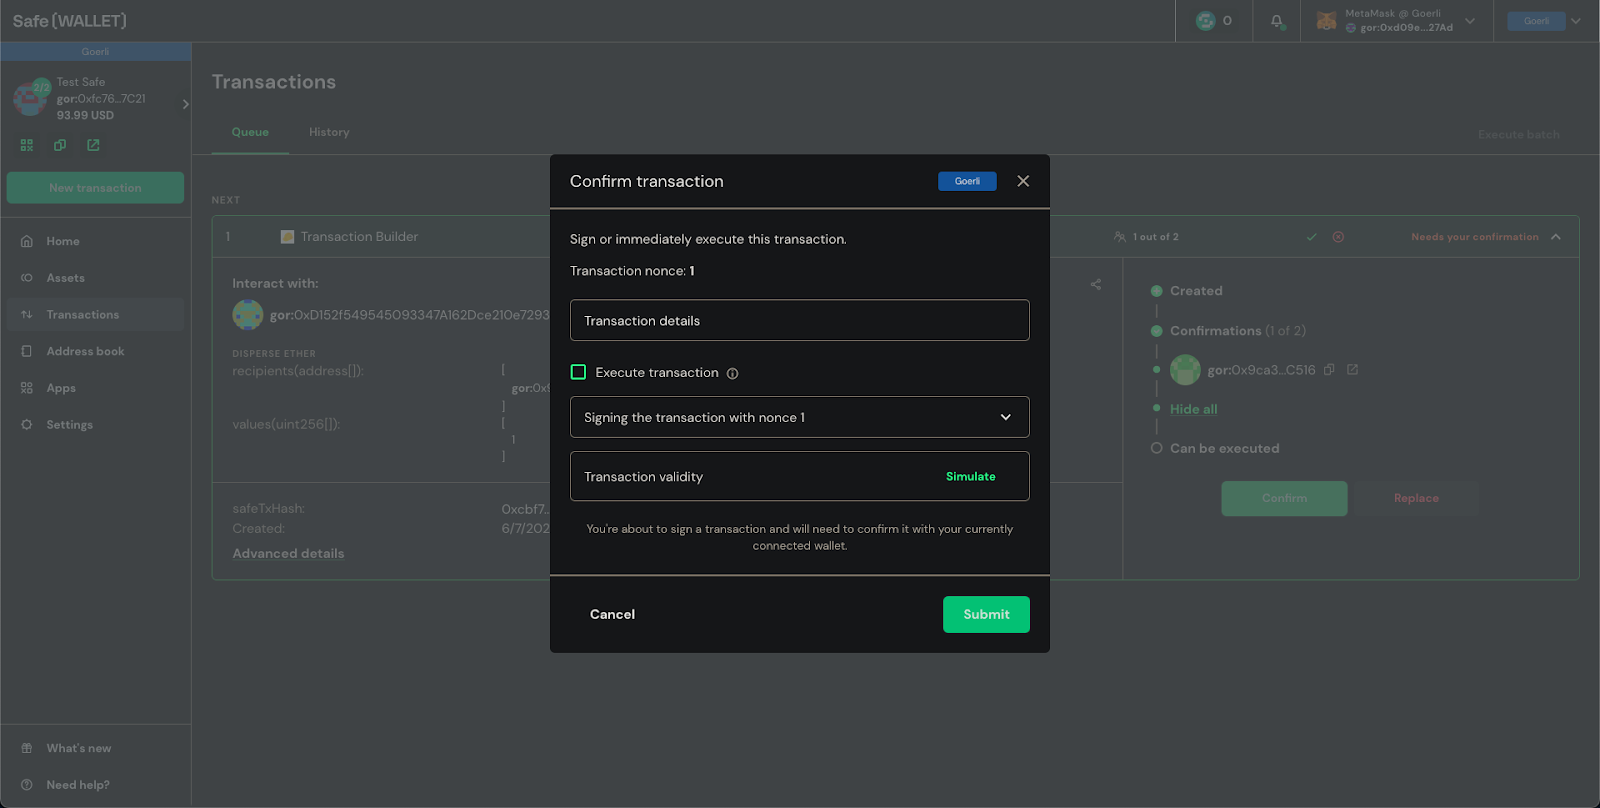
To continue, click “Create Batch” as we only have one action to do, i.e., sending ETH to users, reviewing the transaction summary, and signing to add it to the queue.
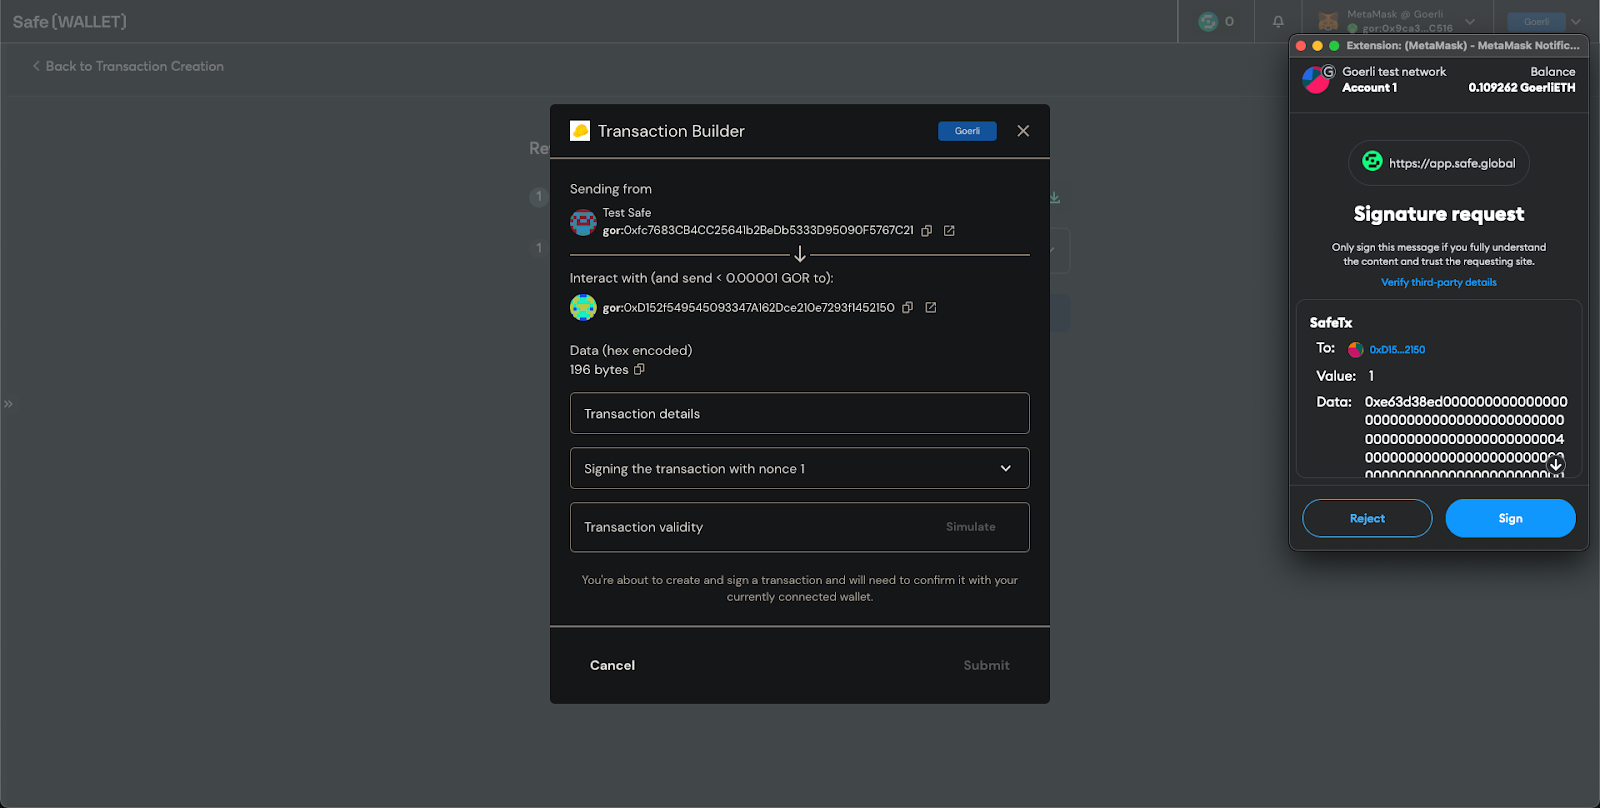

If you head to the Transaction section of your Safe, you should see a transaction waiting to be signed by other owners.
And once other owners have signed and the collected signature has exceeded the threshold, any owner can submit the transaction. In other words, if you’re using Safe yourself with multiple addresses, you only need one with ETH (to submit), while others sign to approve the transaction (signing doesn’t require ETH!).
Limitation of Safe
Even though Safe is the most used multisig wallet these days, there are still some limitations.
First, the create2 function is not supported on the UI. In layperson’s terms, it means that it’s not possible to create multiple Safe across multiple EVM chains with the same address.
https://twitter.com/PopPunkOnChain/status/1626371850396737536
Second, you can’t use Safe for dApps requiring you to sign, as most use EIP-712 which only works for EOAs like your MetaMask address - this is not a Safe problem, but the likes of EIP-1271 aim to solve this. We hope that in the future more dApps will adopt the standard.
Third, the authentication method is limited to signing from owners. How is this a limitation? Well, if you don’t leave any recovery instructions, your family won’t know how to access your assets. With EIP-4337 and the newly launched Safe Core, there may be more ways to “sign” soon on Safe.
Thanks for reading til the end! We hope you’ve learned everything you need about Safe in this one - from creating an account, executing transactions, and knowing their limitations. Stay safe, anons!